In this tutorial you will learn how to create and assign an Alternate Layout for Joomla! Custom Fields, feature introduced in Joomla! 3.9.
Introduction
In this tutorial you will learn how to create and assign an Alternate Layout for Joomla! Custom Fields.
Since the arrival of Custom Fields in Joomla 3.7, there has also been the possibilty to create an alternate layout to display a custom field. However, it was originally only possible to use an alternate layout when manually inserting the field in an article.
Starting from Joomla 3.9, it's now also possible to directly assign an alternate layout to be automatically used by the custom field.
Creating the Layout
The default layout used to render custom fields is located at this path:
/components/com_fields/layouts/field/render.php
You can use this default file as your starting base. To create an alternative layout, you don't have to edit this core file directly.
Instead, override it in your template, by copying this render.php file to this path:
/templates/[my_template]/html/layouts/com_fields/field/my-layout.php
You can give your layout file any name, and then you can edit the code to meet your needs.
Note: The only restriction is that the file name cannot contain an underscore.
Layout Examples
The following custom layout file example surrounds the custom field output with a well div, and makes the label a H3 heading:
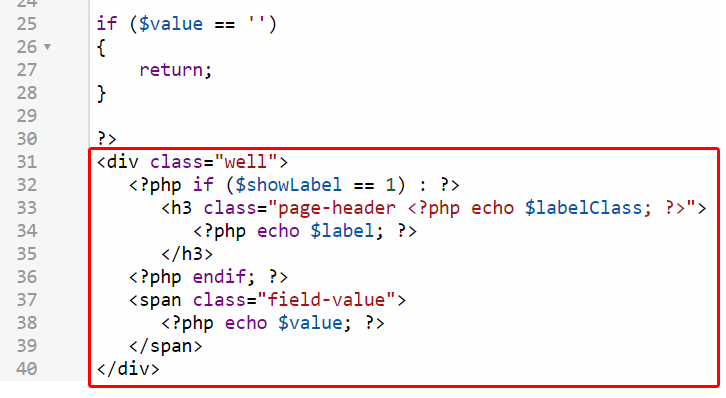
This would result in something like:
Habitat Area
Europe
Here a few more examples / ideas for alternate layouts that you could use as inspiration:
- Formatted Number: Output number values with proper thousand separators by replacing
$valuewithnumber_format($value) - Decimal Number: Output numbers with separators and two decimals with
number_format($value, 2, '.', ',') - Color the value: Output colors by coloring the value with
<span style="color: <?php echo $value; ?>"><?php echo $value; ?></span>
Or simply add any text or HTML before and after the output to customize the layout to your likings.
You can create as many alternate layouts as you want, each with its own file name.
Assigning the Layout as Default
Now, starting from Joomla 3.9, when creating/editing a Custom Field you find the "Layout" parameter under the tab Options > Render Options > Layout:
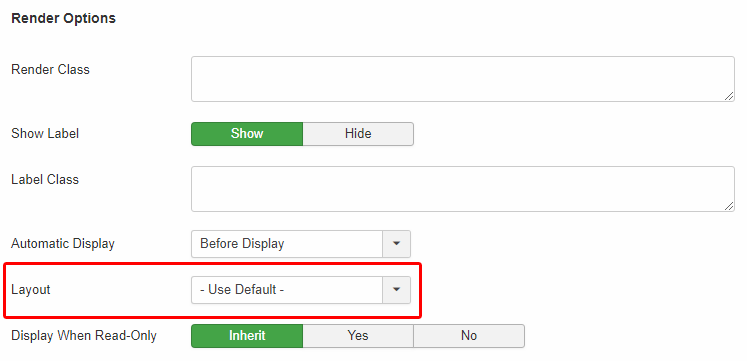
This will list all the alternate layouts you created. Simply select and assign your desired one:

Now, the custom field will always be using your assigned layout automatically.
Overriding the Layout manually
The layout assigned via the option is the layout that the custom field will use by default. This makes it easier as you don't need to worry about manually overriding it each time you output it.
However, if you need, you can still individually override the layout when you manually insert a custom field in an article.
A custom field can be manually inserted in an article using syntax {field #}. For example, {field 1} will display the field with the ID 1.
To override the layout in this instance, append it with a comma followed by the name of the layout. So, {field 1,my-layout} will display the selected field using the alternative layout my-layout.php.
Using the Layout in Articles Anywhere
You can take advantage of the Alternate Layout feature also in Regular Labs extensions Articles Anywhere and Articles Field. Read: